
RouteSavvy User Guide – 1.2 – Access/Login
To register for a free 14-day trial of RouteSavvy visit https://www.routesavvy.com/routesavvy-free-trial/
Once you have registered for RouteSavvy, you will receive a trial license key via email. The license key is unique to your account and should be kept private. You may share this link with anyone in your organization who needs to evaluate RouteSavvy, there is no need to create multiple accounts. Example license key: https://web.routesavvy.com/Home/Index/605f1fff46. Clicking on the link will load RouteSavvy and login automatically, no need to remember a user name and password.
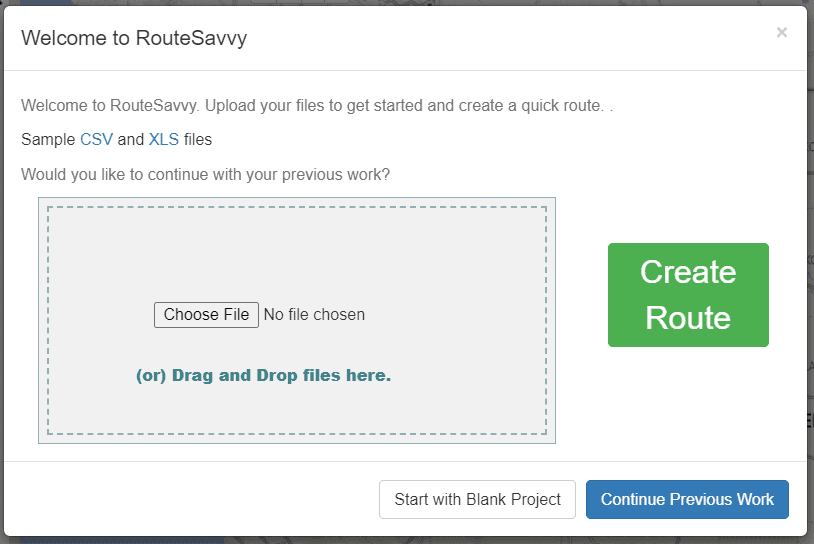
The “Welcome to RouteSavvy” dialog offers the option of using a previously auto-saved project. If your browser is closed, your working locations, stops, shapes and all data are automatically saved, available for the next time you access RouteSavvy. Make sure you select “Continue Previous Work” or if you wish to start a brand new session simply select the “Start Over” Button. The “Create Route” button allows you to immediately begin creating a route with a file that choose or drag-n-drop to this dialog.
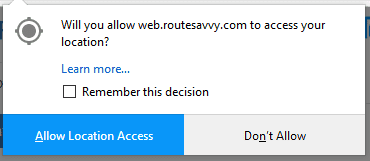
When RouteSavvy loads, the initial screen provides an option to center the map based on your browser’s geo-location. This doesn’t save your location, it just centers the map to your location. You can Allow Once, Allow Always, or Ignore if you don’t want the map to be centered. This will not affect how RouteSavvy functions, it only changes whether your map automatically centers on your location when you open RouteSavvy.
If you have questions contact RouteSavvy Support.