

The Route Planner tab is your home for managing routes. Here you can create new routes, select which route you are working with, and even copy existing routes.
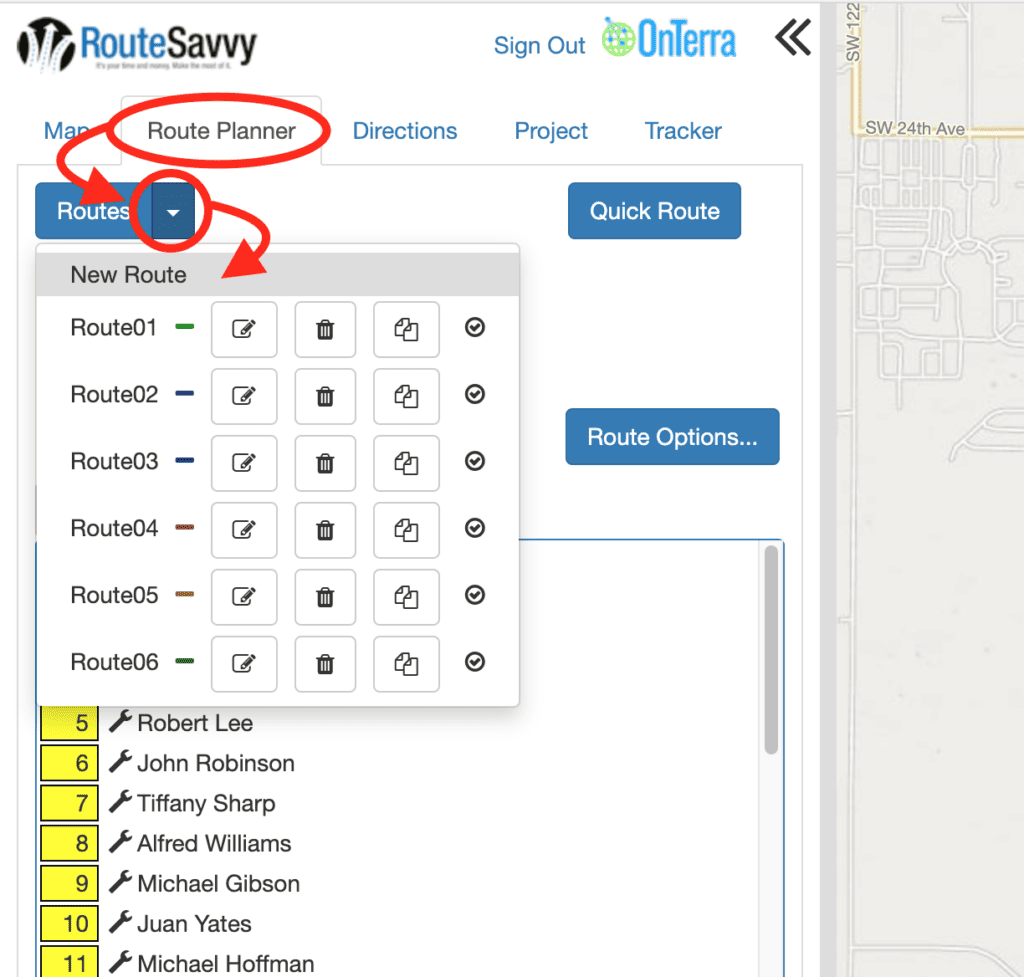
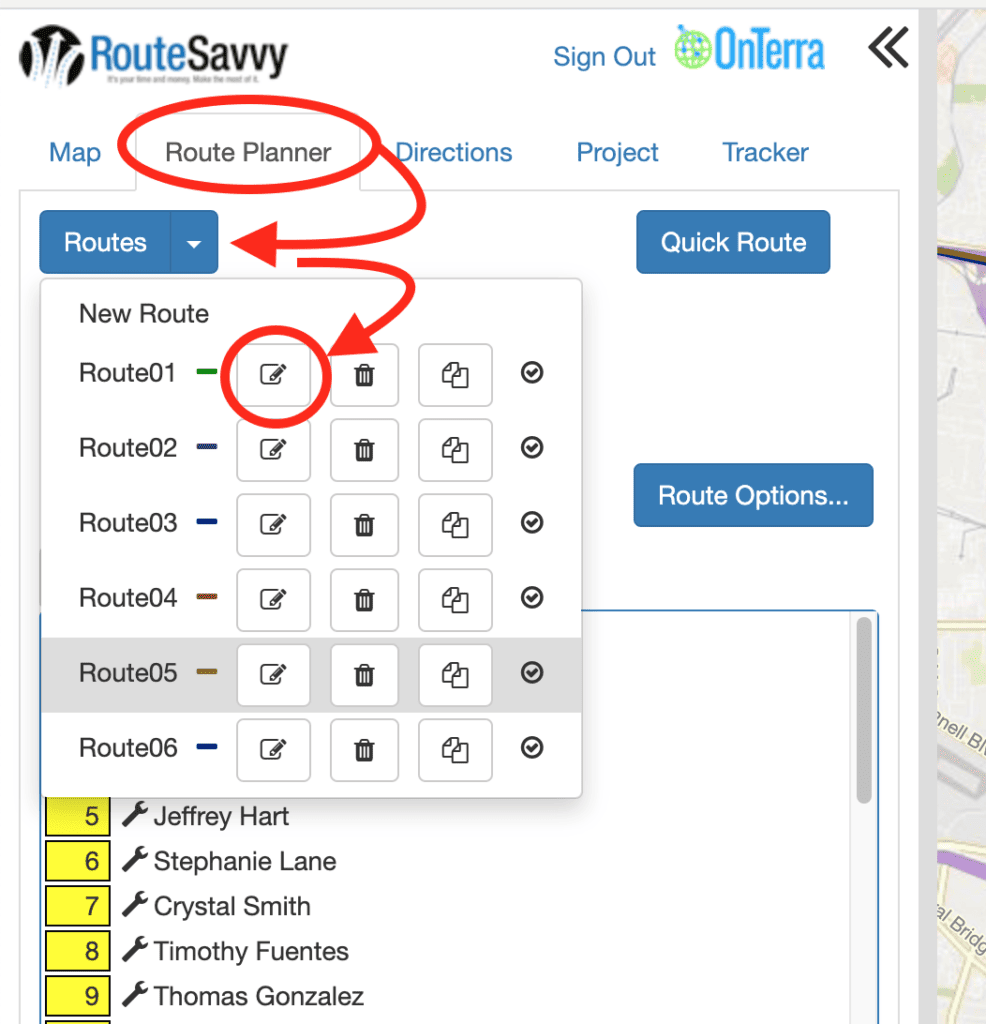
To create a new route, go to the Route Planner tab and click on the dropdown located by the “Routes” button. Then click New Route.
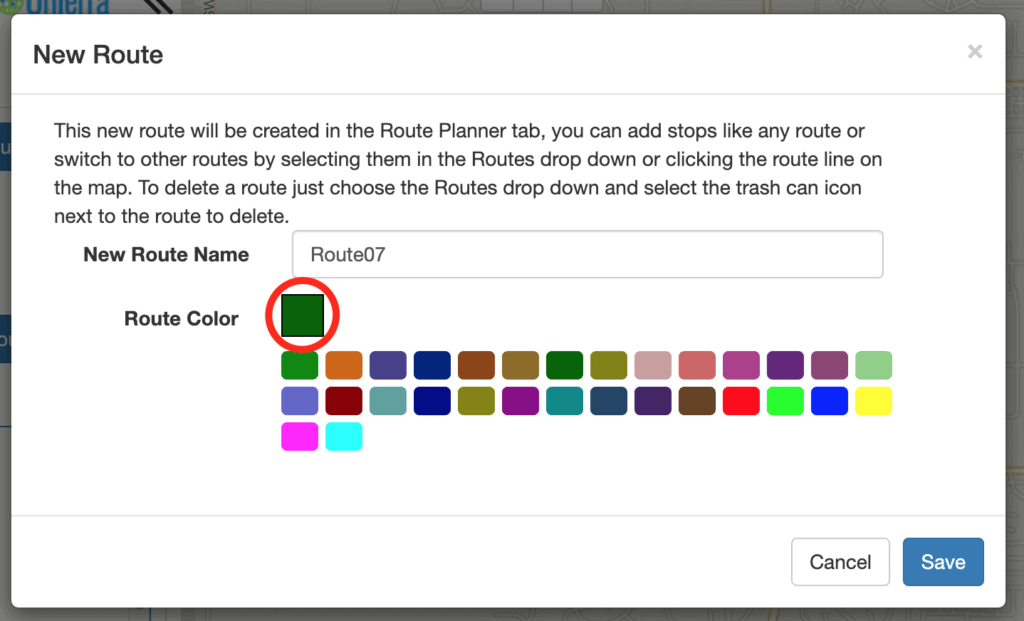
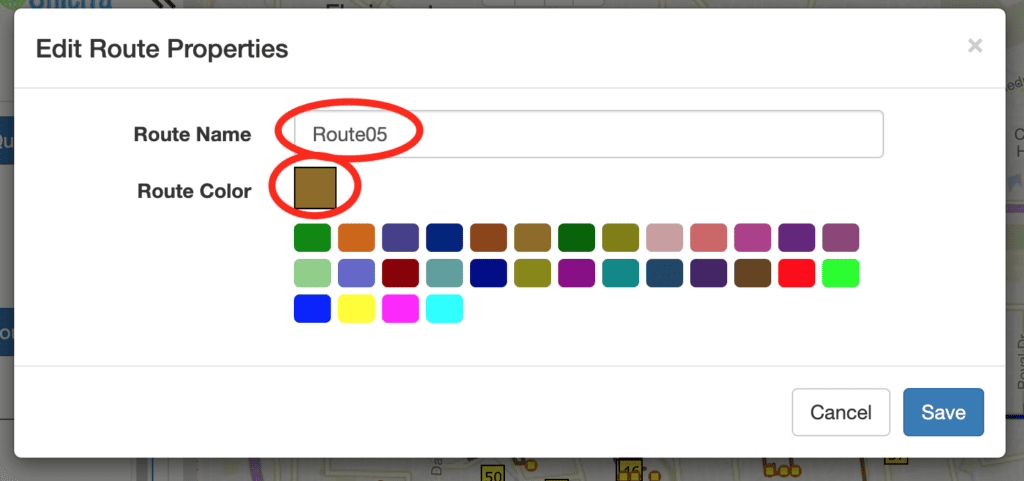
This will open the New Route dialog box where you can choose a route name. Click on the color box if you wish to change the current route line color, i.e., the line that displays on the map that corresponds to the route.
You also can choose the active route by going to the Route Planner tab and clicking the dropdown on the Routes button, and then clicking the name of the route you wish to select.
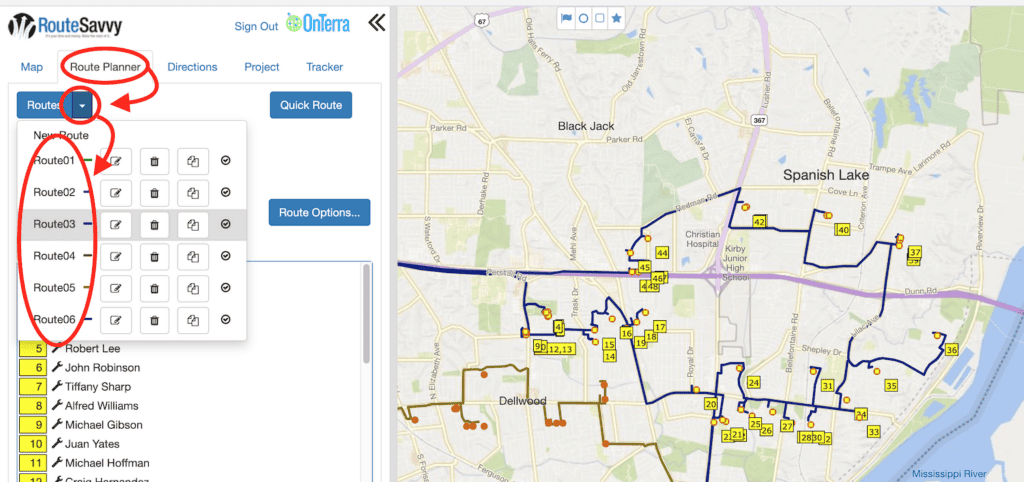
The other simple way to choose the active route is to find the route on the map and click on the route line with your mouse. You’ll know you are clicking on the route line when the it becomes bold.

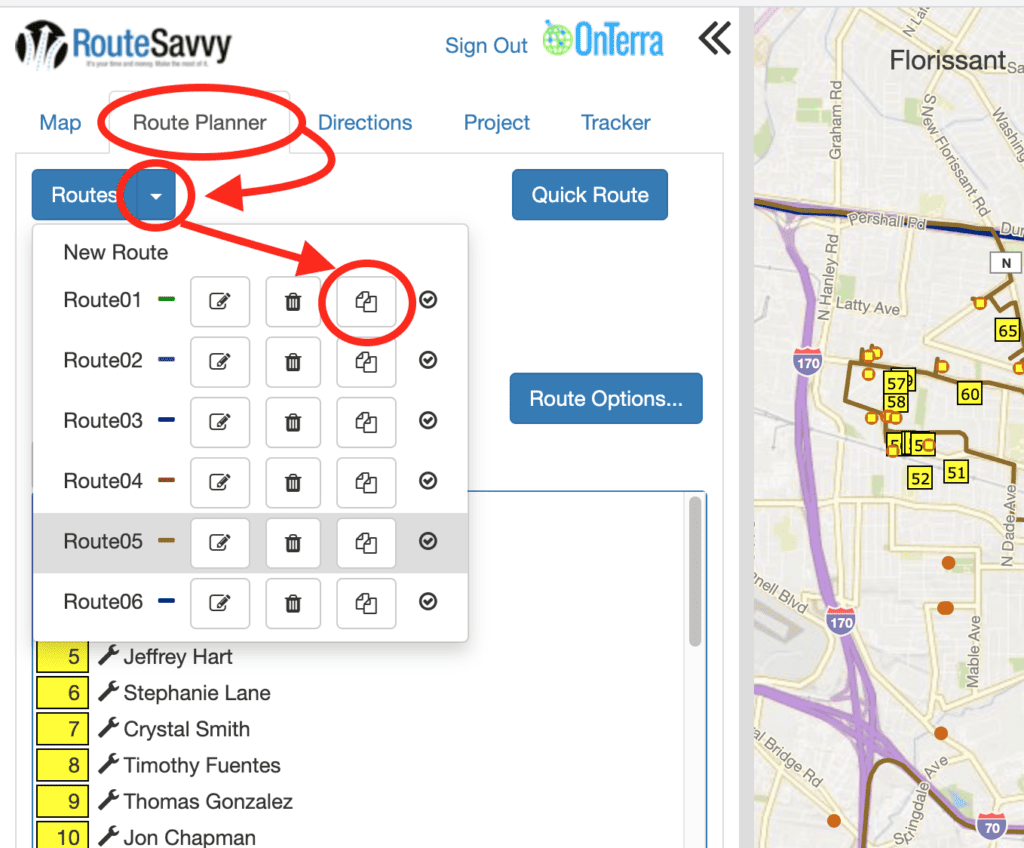
Route Cloning can be very useful if you want to create a route that is based on another route. For example, if your Wednesday route is comprised of everybody on the Monday route, plus a few other people, you can copy the Monday route and then add those additional people. Also, if you have a regular, static Tuesday route, for example, but this Tuesday will be different. You could copy your Tuesday route, make any necessary changes for this week only, and then when you are done with that route, you can simply delete the copied route with the changes and revert back to your standard Tuesday route. Since you copied the original, you don’t have to change it. Instead, you can make changes only to the copy, or cloned route.
You also can edit the name and route line color of any route to suit your needs. Click on the dropdown on the Routes button, then click the Edit button for the route you wish to edit.
This will open the Edit Route Properties dialog box, where you can change the name and the route line color of the route.
The OnTerra Systems team routinely gets kudos for the responsiveness of our tech support. We hope this RouteSavvy route building tutorial was helpful. If you have any questions about how to maximize your use RouteSavvy, you can email support@routesavvy.com.