

This RouteSavvy Address Management Tutorial covers the multiple facets of address management including RouteSavvy address upload tools and the RouteSavvy Address Quick Find bar.
There are multiple ways to upload addresses to RouteSavvy. If you have a more complicated routing scenario, the best thing approach is to upload all of your addresses to the map and divide up the routes yourself. You then can use RouteSavvy’s powerful algorithm to optimize the stops within each route. From time to time, you may need to upload a single address, and we’ll cover that in this RouteSavvy Address Management Tutorial as well.
RouteSavvy Address Management Tutorial: Uploading Multiple Addresses
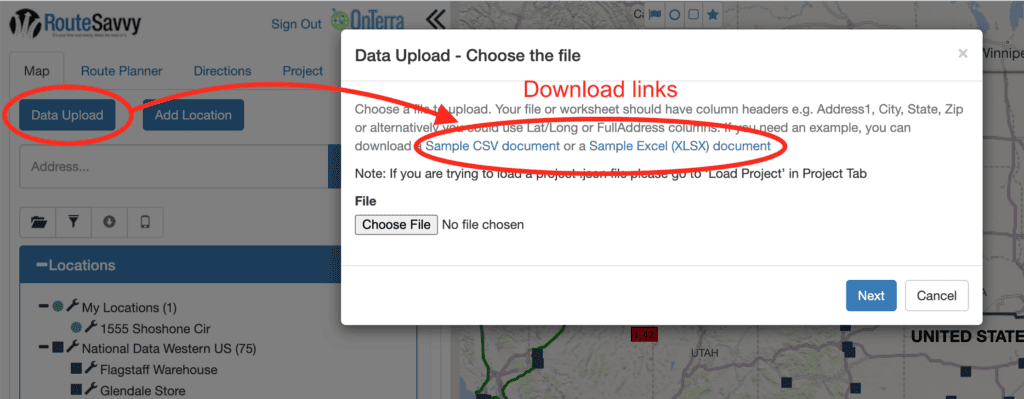
Uploading multiple addresses is quick and easy, especially if you can get them all onto a spreadsheet and format the column headings. You can always find sample spreadsheets within RouteSavvy itself in either Excel or .CSV format by clicking on the Data Upload button on the Map tab.
Once your data is formatted, you can upload it very easily. Consider how you will use the 5 notes fields available for each location. The notes will appear later on the directions that you send, so this should be reserved for information that is useful for your driver or technician in the field. Common usage includes an onsite manager’s phone number, a customer’s account number, work to be completed, and any special instructions for the site. If you use the RouteSavvy Mobile App, it’s suggested to reserve the Note 5 field for email addresses, since an automatic confirmation will be sent to that address when the delivery or service is marked as complete in the Mobile App.
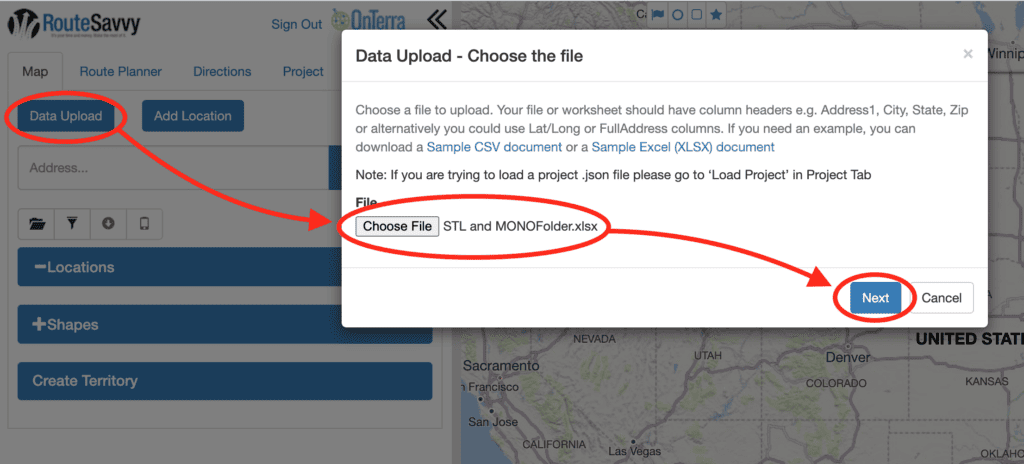
To upload a spreadsheet, click on Data Upload in the Map tab, then browse to choose your file, or drag and drop it to the Data Upload dialog box.
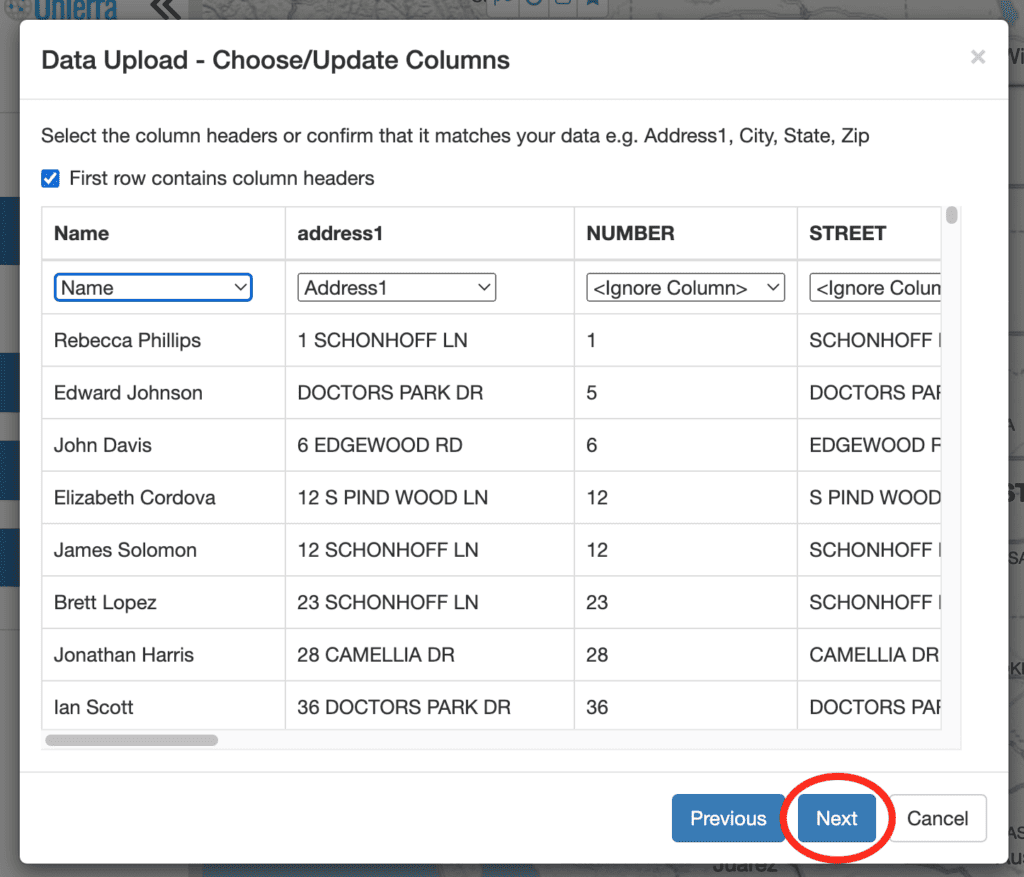
On the next screen, you can make sure that RouteSavvy has matched all of your column headings. If your format is not perfect, you can always click on any of the drop-down menus and choose from the options to tell RouteSavvy what you want to do with a particular column. Once everything is ready, click Next.
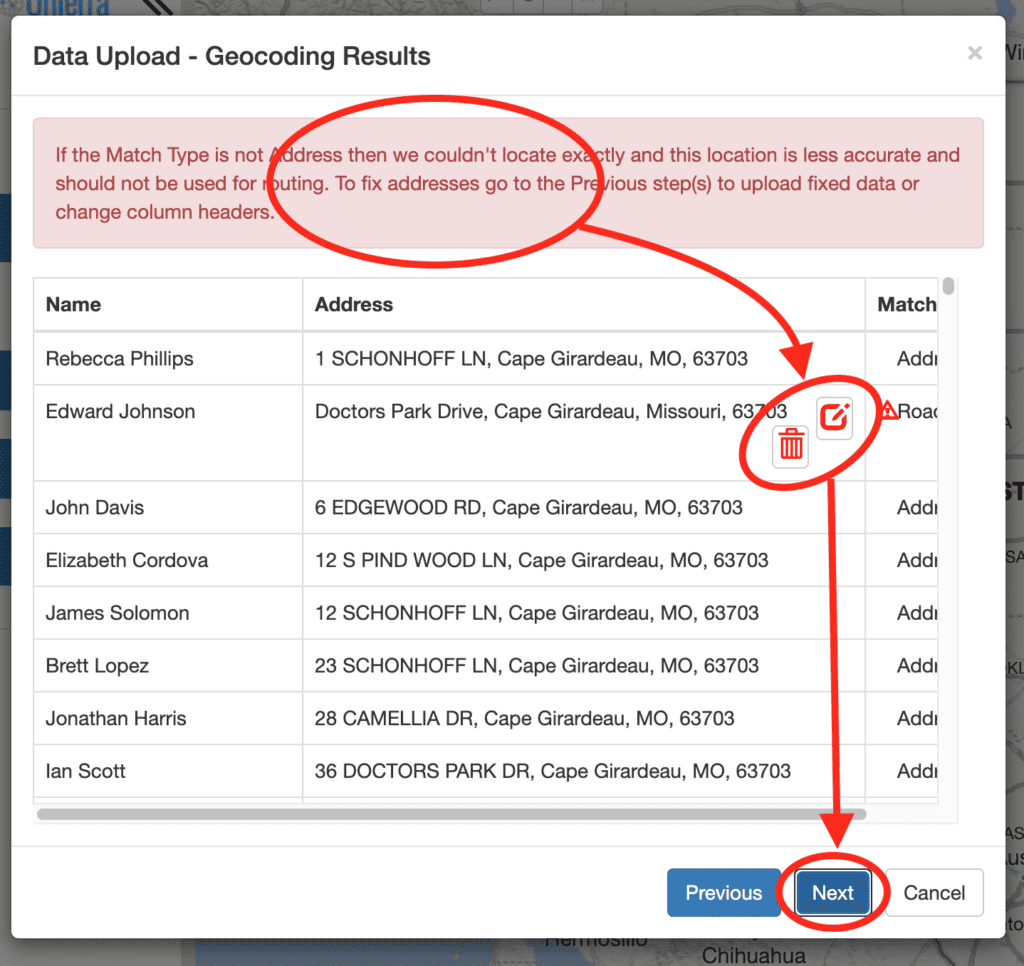
If you see a red warning message on the next screen, it means that RouteSavvy was not able to find one or more of your addresses. The best option is to click the Edit button and correct the address here. You also can choose to delete the location at this time, and then add it later, or you can simply ignore the warning. If you choose to ignore the warning, RouteSavvy will warn you before you can add this address to a route, and you will want to fix it before using it for routing. Then click Next.
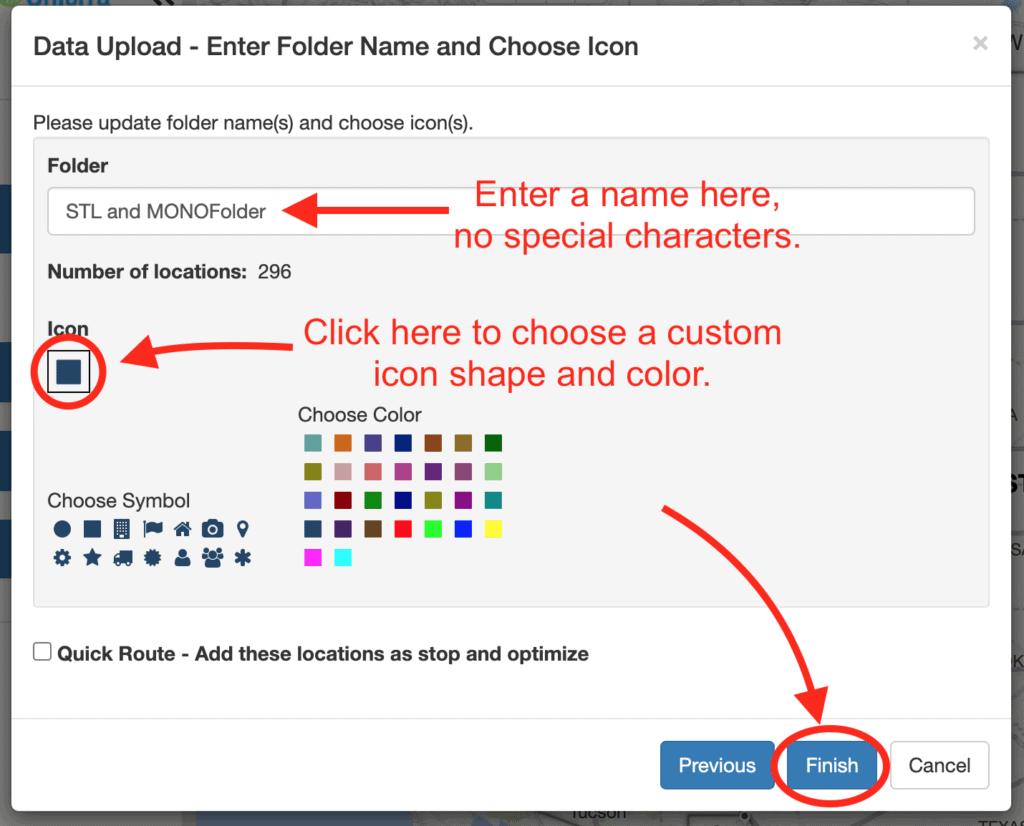
On the next screen, you can choose a name for the folder where RouteSavvy will keep these locations, and you also can choose a custom icon shape and color. Click Finish and RouteSavvy will display your locations on the map.
Now that you have the locations on the map, you can use all of the routing features to divide them up into routes. You can find out more about Routes in the RouteSavvy User Guide.
RouteSavvy Address Management Tutorial: Uploading A Single Address
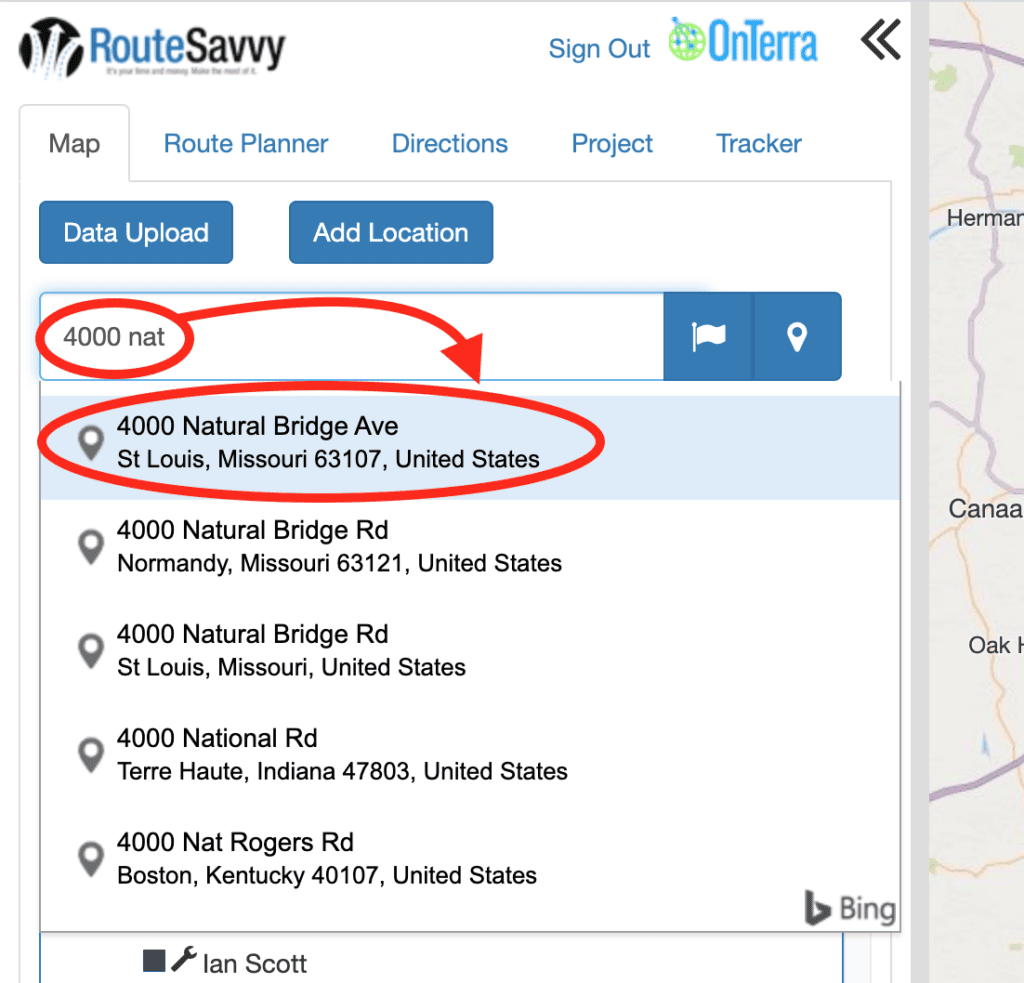
Uploading a single address is even easier than uploading a spreadsheet. Simply start typing the desired address in the “Address…” Quick Find Bar on the Map tab. When you see the full address you want, click on it in the list below the Quick Find Bar. Keep in mind that you can also search by Point of Interest in the Quick Find Bar, so for example, if you enter a business name, RouteSavvy will find businesses with that name in the area of your map display.
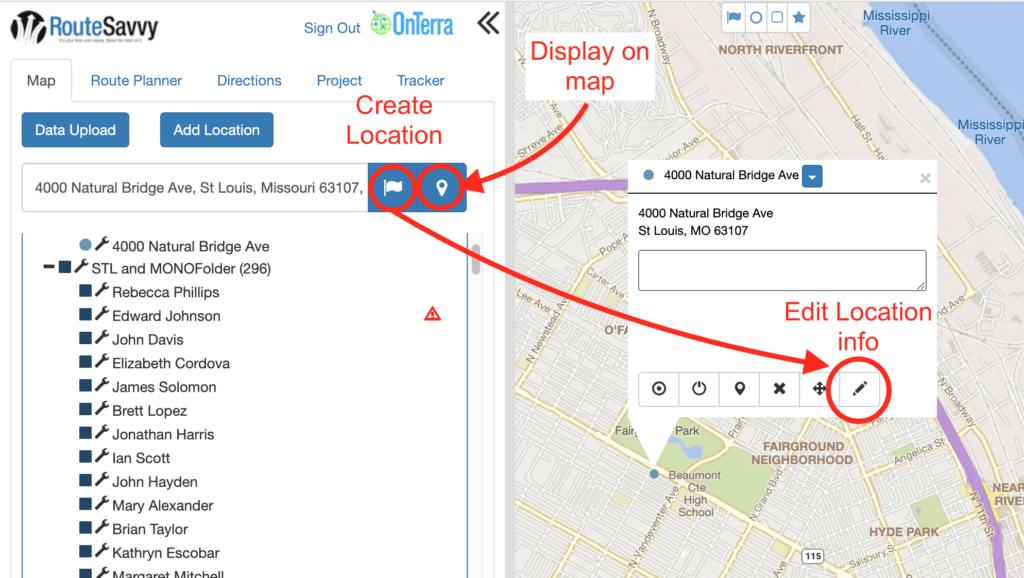
You can click on the upside-down teardrop icon to display the location on the map. Clicking on the flag button will create a Location using the address in the search bar. Once the Location is created, click on the pencil icon (the “edit” button) to enter Location information, such as Notes, Stop Time, and Stop Units, or to change the name of the Location.
RouteSavvy makes it fast & easy to handle RouteSavvy address management, whether you are uploading multiple addresses or add a single address.
Did You Know: RouteSavvy now offers live CHAT support. Just open the chat window, either from the RouteSavvy website. Or access the new CHAT function within the RouteSavvy application. You’ll be able to see when our agents are online, and start a chat with a real human. You also can drag and drop screenshots of error messages, data, or project files for our support agents to review and assist. We are here to answer any and all questions, so please reach out via the CHAT function if you need help.
Want to take RouteSavvy for a test drive? Try our FREE, 14-day trial.