

This RouteSavvy Quick Route tutorial and video provides step-by-step instructions and a handy video on how to use the Quick Route function in RouteSavvy route planning software. RouteSavvy’s Quick Route function can be very handy if you already know which locations belong on each route, and you have them separated into smaller spreadsheets. You can easily choose a file or drag and drop a file to the Quick Route window and follow the simple steps for faster generation of optimized routes. RouteSavvy’s Quick Route will upload the locations, ask for the start and end of the route, add the locations as stops on the route, and then create the route on the map for you, all in a fast, seamless process. Check out the instructions below or access the VIDEO.
RouteSavvy Quick Route Tutorial Instructions
Here’s how to build an optimized route using RouteSavvy’s Quick Route function:
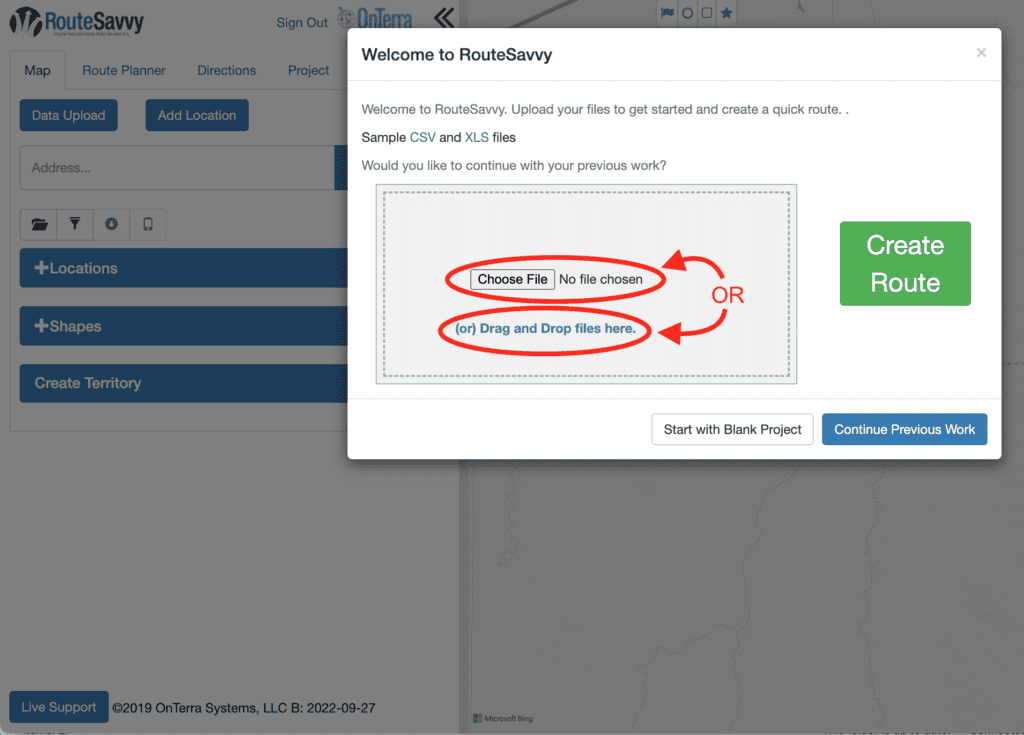
First, choose or drag and drop your file with addresses (stops) to the Quick Route dialog box and LEFT CLICK on Create Route.
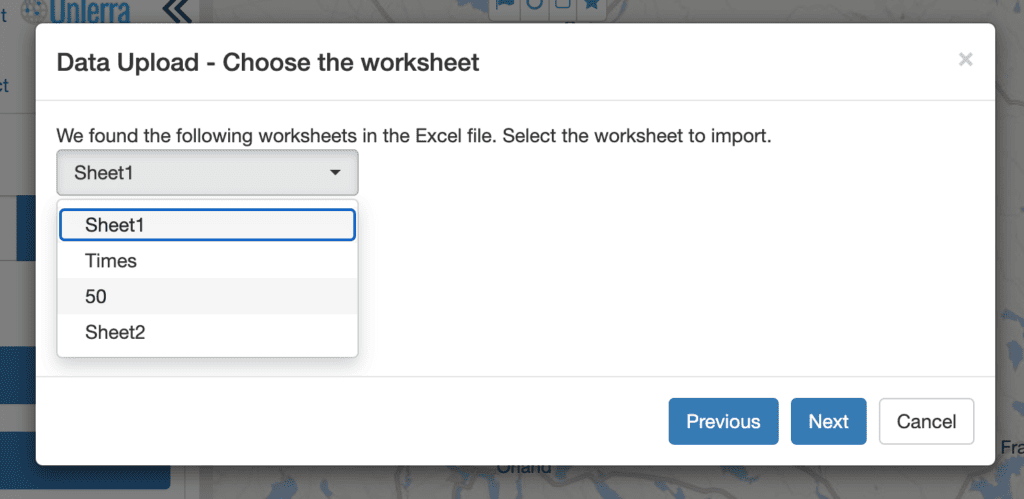
NOTE: If you are uploading an Excel spreadsheet with multiple tabs, RouteSavvy will allow you to pick which individual tab you want to upload.
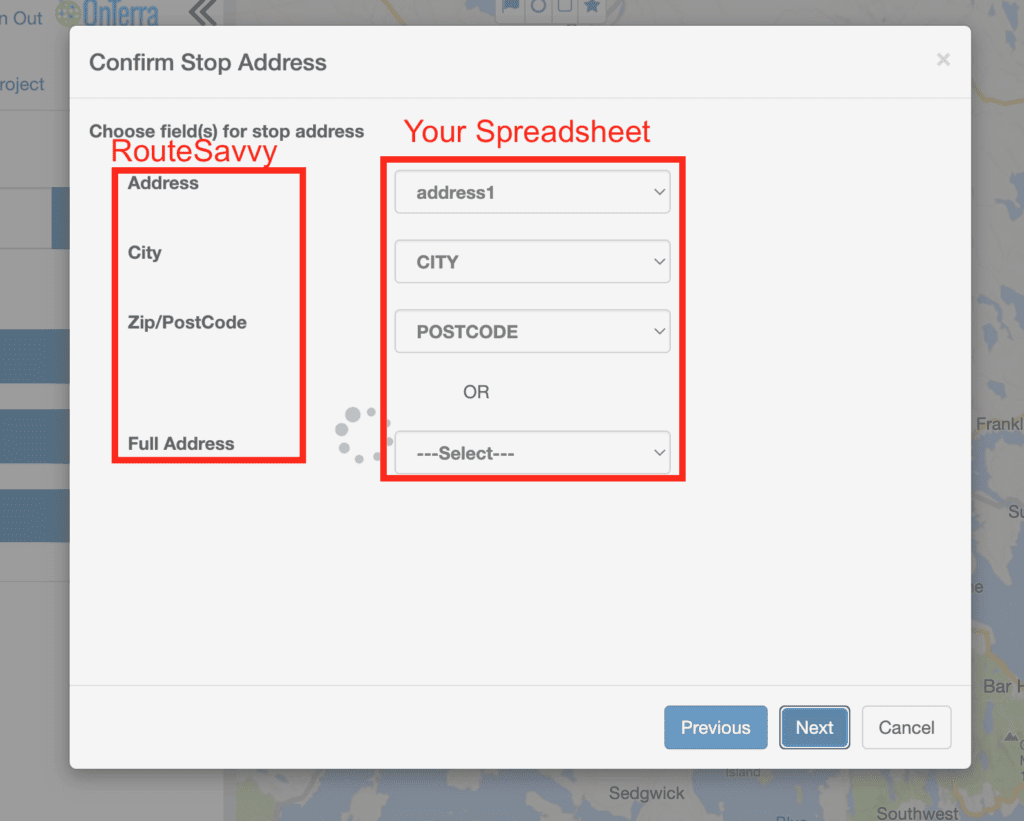
If RouteSavvy finds any issues in determining what to do with the columns on your spreadsheet, it may ask you to define your columns. The drop-down menus on the right correspond to the headers on your spreadsheet and the list on the left is what RouteSavvy will do with that column.
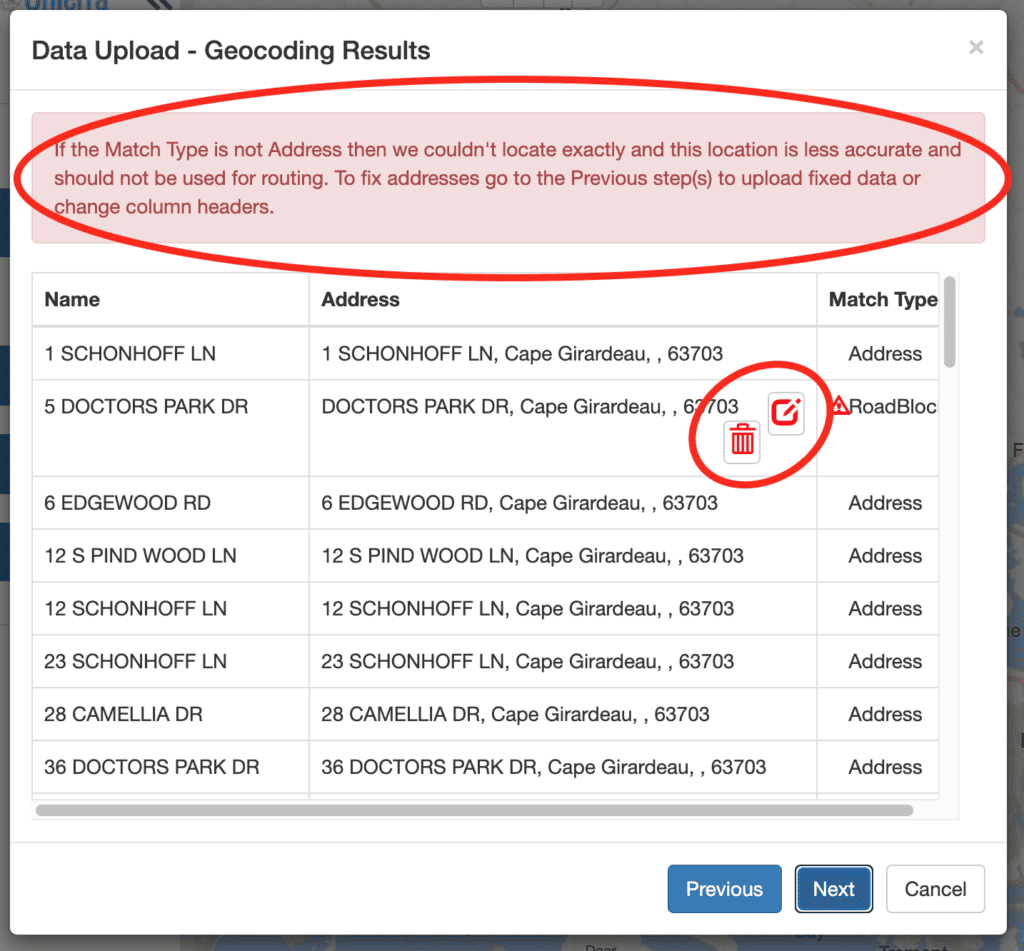
NOTE: If you have any geocoding issues in your data, you will need to fix or delete those locations, since they will be going straight into the route in just a couple more clicks.
Next, you can name the route, select an existing start location, and end location, or enter new ones, and choose your route options, such as start time.

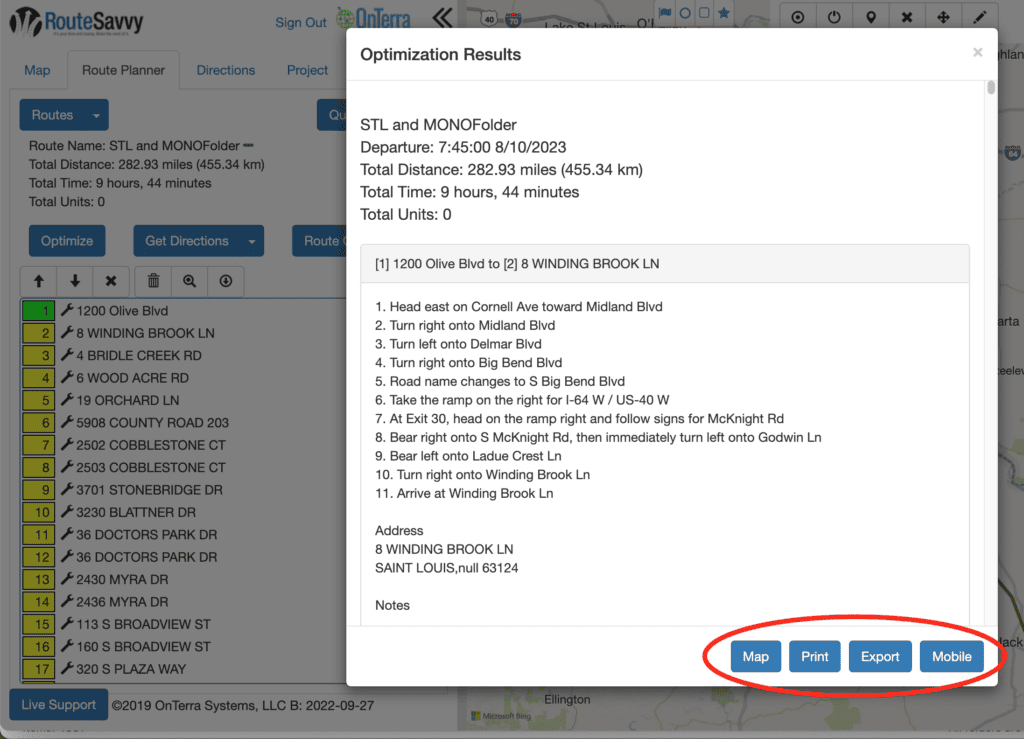
When you LEFT CLICK the blue Next button in the lower right corner of the dialog box, RouteSavvy will now add all of your uploaded locations as stops and optimize your route. Once RouteSavvy has generated the optimized route, from the next screen, you can send a mobile route to your drivers, print the route for drivers, export the route in another format, or simply choose to view the newly optimized route on the map.
As always, if you have RouteSavvy questions, we’re here for you, just email RouteSavvy support.
Interested in seeing RouteSavvy in action? Sign up for a Free, 14-day Trial.