

This RouteSavvy Shape Tools Tutorial covers how to use the Circle, Rectangle & Polygon shapes to define areas & territories for your route planning. RouteSavvy Shape Tools provide helpful functionality that can be used in a variety of ways. Of note, the shapes that you draw on the RouteSavvy map to define a delivery, pick-up, or service area or territory have access to the same set of menu options. In addition, the shape menu applies to “visible locations.” You can hide locations from the map so that they’re not affected by these shape menu actions. Here are two of the most powerful shape menu options that will help with your route planning and route management:
• Add Visible Locations As Stops
• Move Visible Locations To Another Folder
This RouteSavvy Shape Tools Tutorial provides step-by-step instructions just below. If you’d prefer to watch a VIDEO TUTORIAL, click or tap HERE.
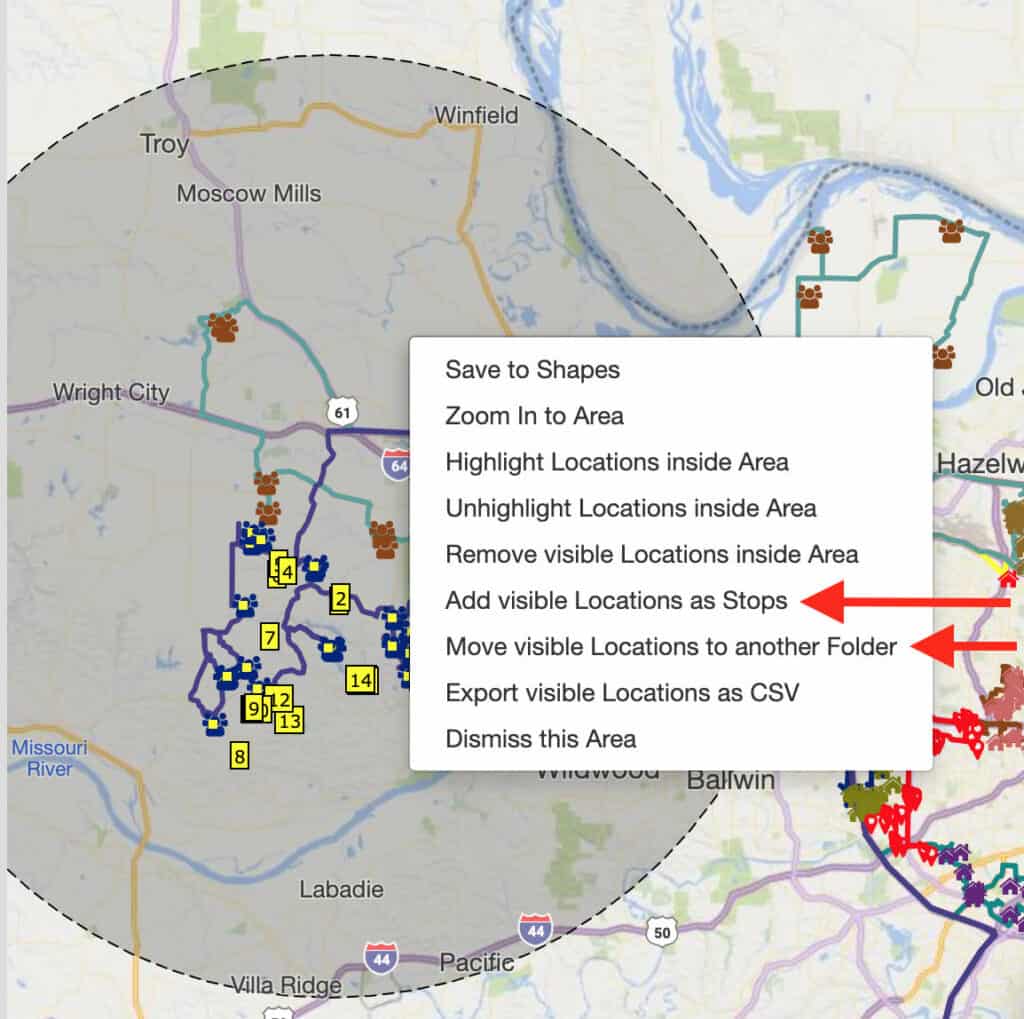
Add Visible Locations As Stops – This will add any visible locations inside the shape to the active route in the Route Planner tab.
Move Visible Locations To Another Folder – This helps you organize and color code your locations. There are many ways you can use folders to help visualize your data on the map, such as assigning a unique icon to each driver and assigning a unique color for each day of the week. For example, all Monday routes could be the same color, with each driver assigned their own icon. Give some thought on how you can best organize your icons for your company’s unique needs.
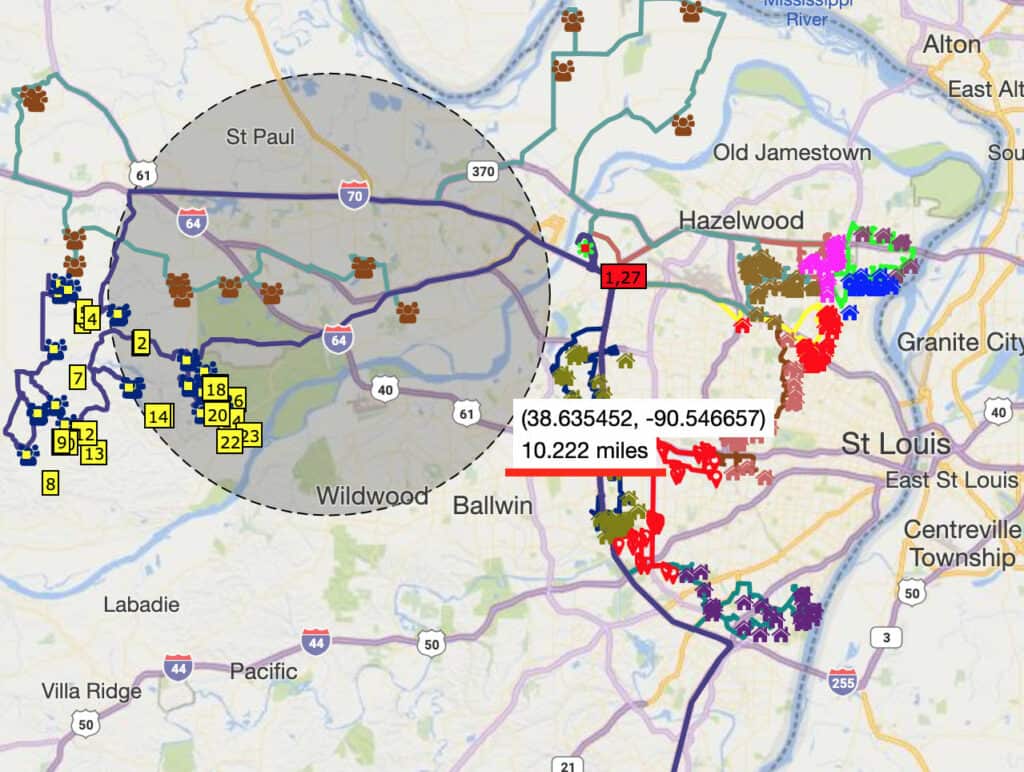
The RouteSavvy Circle Tool creates a circular shape; click and drag from the center out to expand the circumference of the circle. The circle tool is especially useful if you want to know distance from a given location or if you want to set a specific boundary for how far you’ll go for deliveries, pickups, service calls, or sales calls. For example, you could set a delivery boundary of no more than 10 miles from your office or shop.
The RouteSavvy Rectangle Tool creates a rectangle, and can be upsized or downsized by dragging from corner to corner.

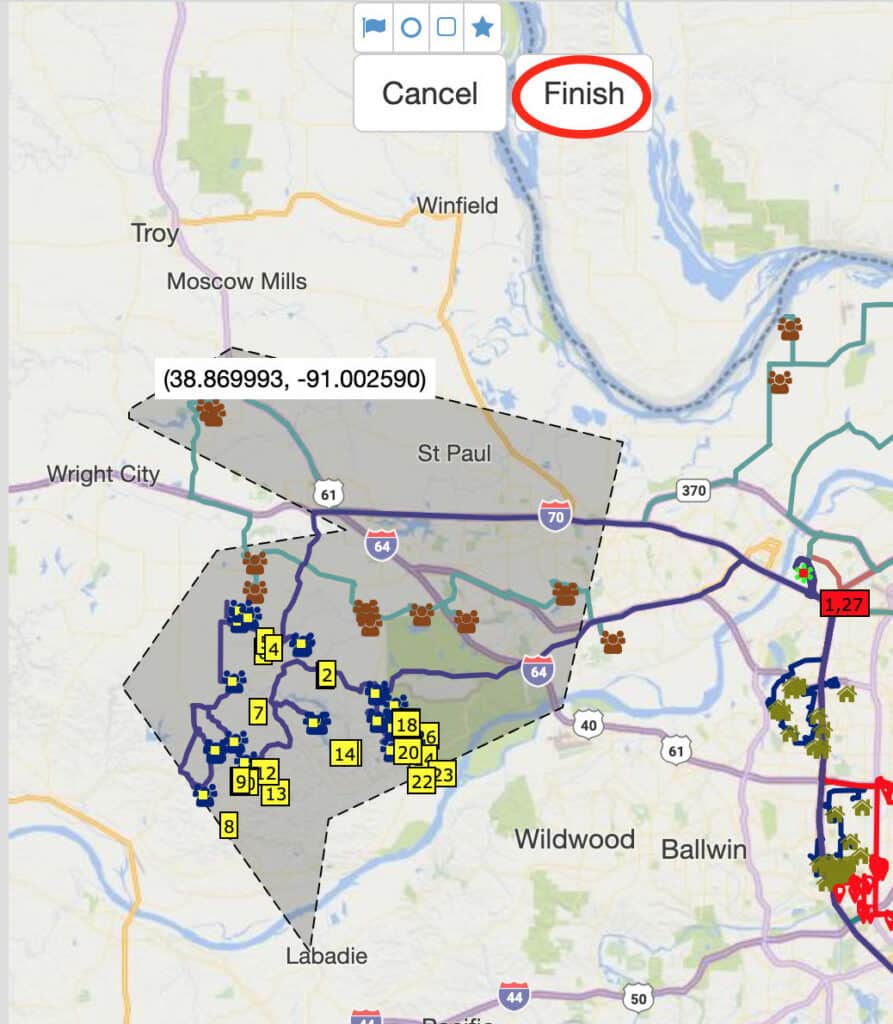
The RouteSavvy Polygon Tool generally is the most useful, because it can create odd-shaped areas or territories. Users also can easily exclude locations by clicking around them. To do this, hold the cursor still, left click, and let go. This creates a kind of an anchor point, and as you move your mouse, it leaves a trail behind it. Click on multiple points around the area you wish to select. To finish creating a custom Polygon shape, you can double-click or click “Finish” at the top of the screen.
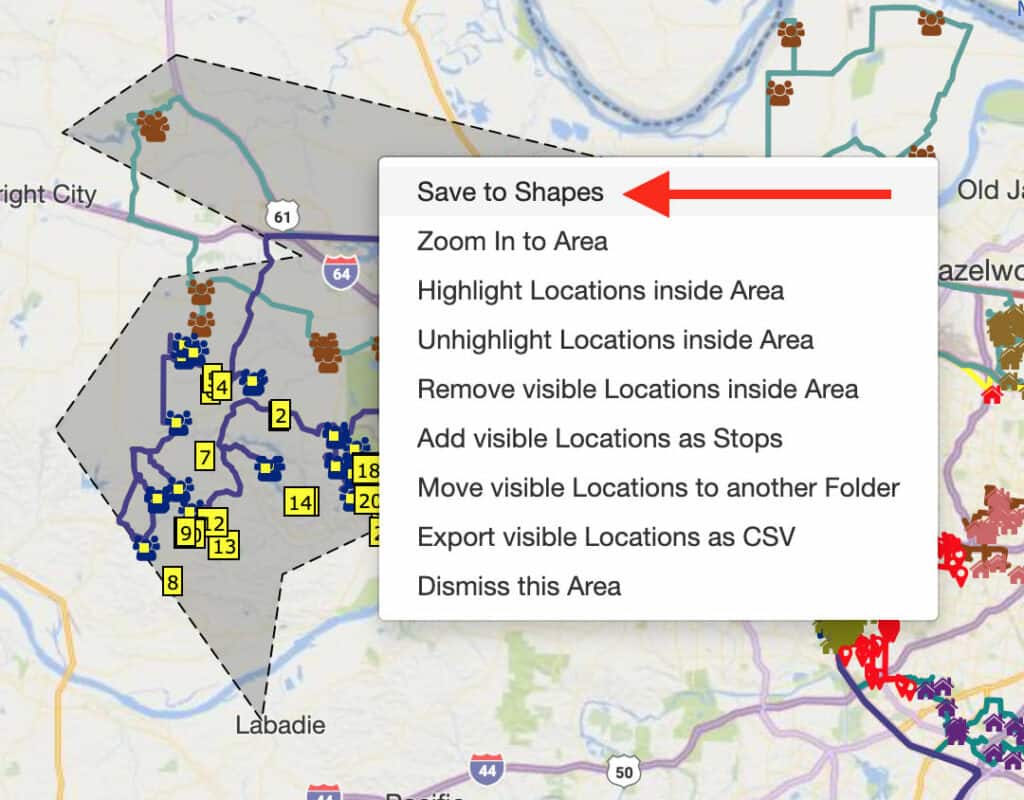
You also may save any temporary shape, such as any of the gray shapes in the screenshots above, thereby creating a Territory.
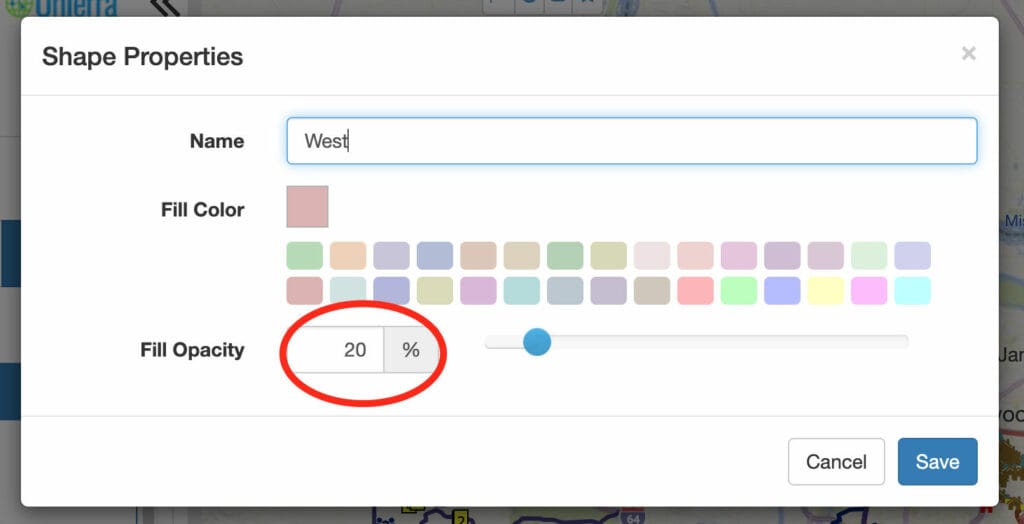
In the Shape Properties dialog box, you can assign any name for the territory and select the fill color and opacity. We suggest setting the Opacity to roughly the 20% range so you can still see the underlying map, locations, and stops.
Note that once your shape is saved, you can still right-click on it to access all the standard shape menu items, such as Add Visible Locations as Stops, and Move Visible Locations To Another Folder.
There are additional actions you can take in the Shapes Menu, which is found at the bottom of the Map tab, underneath your Locations menu. “Shape Label” is the name you chose for the saved shape, in this case “West.”
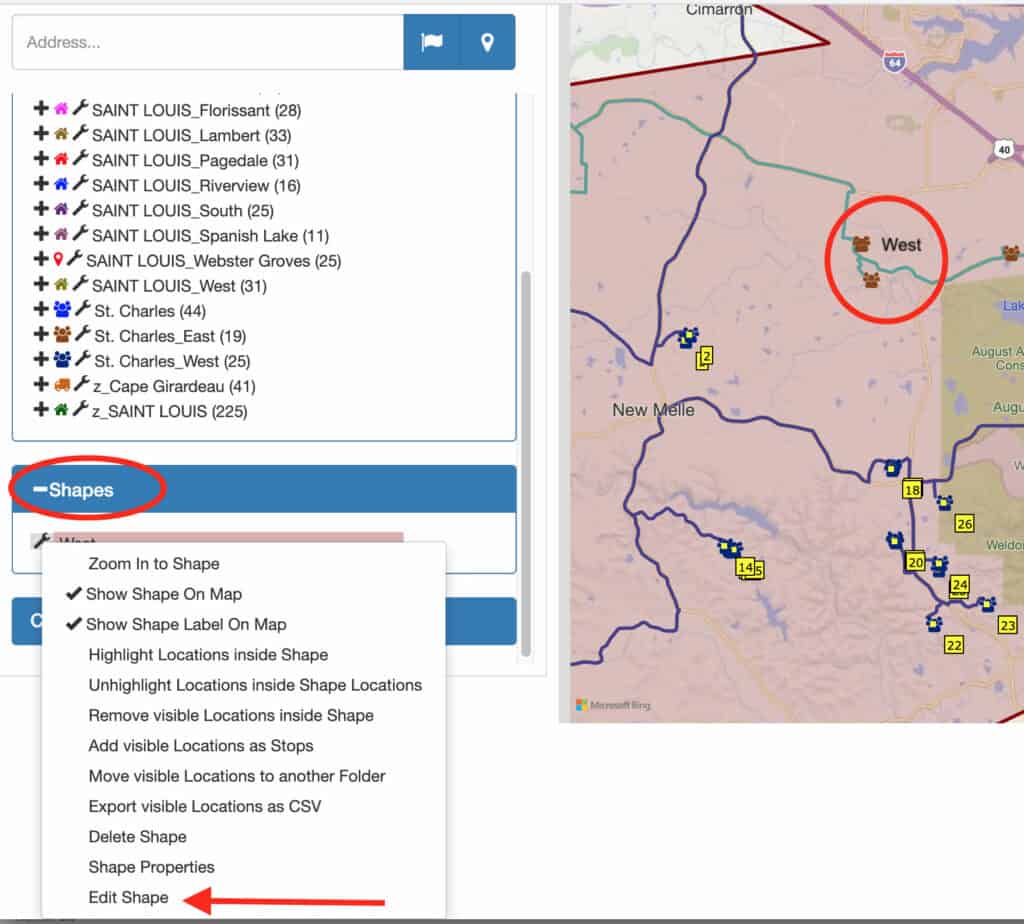
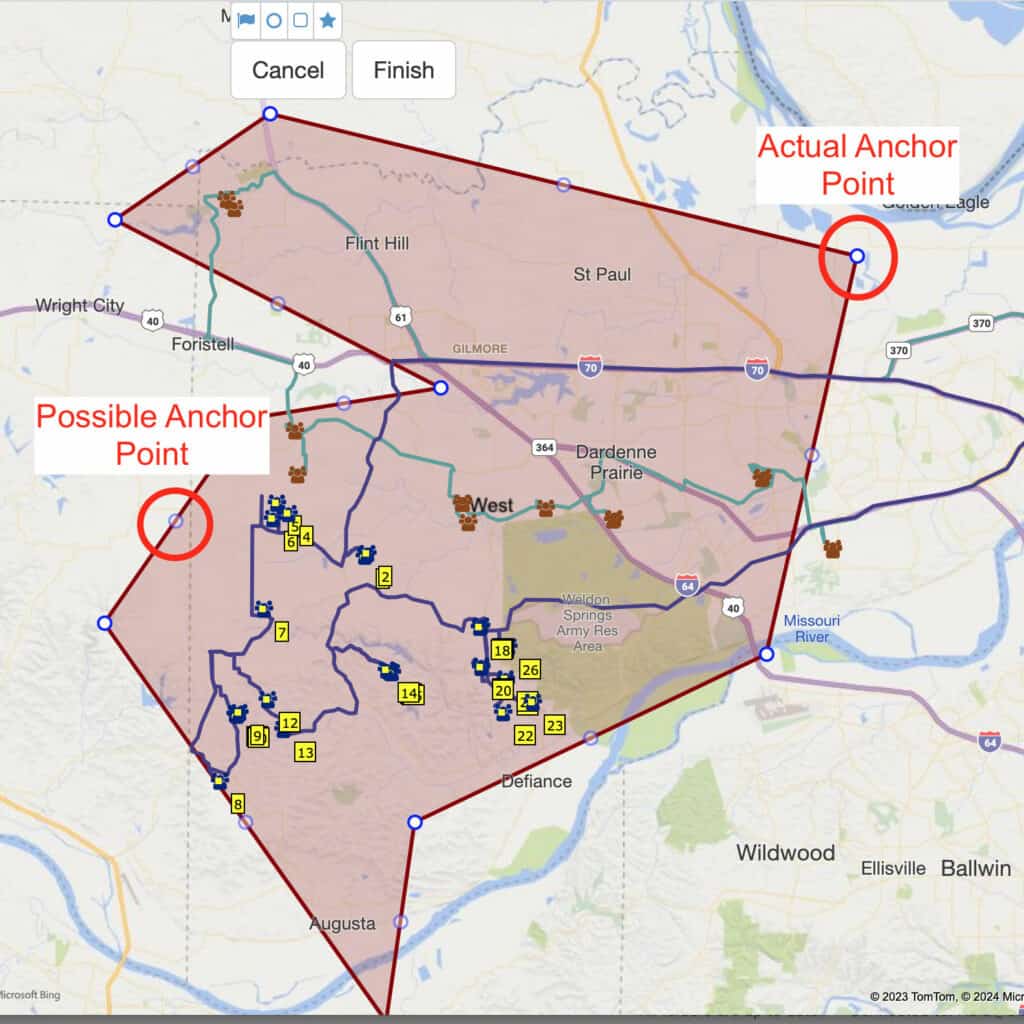
You can show or hide the shape label, or the entire shape. You also can choose Edit Shape to refine it. Any of the blue circles may be dragged to another location. The dark blue circles are anchor points where you actually clicked when making the shape. The lighter blue circles are “Possible Anchor Points,” located half-way between each point on which you actually clicked. Any of these possible anchor points may be clicked and dragged to further change the dimensions of the shape. When finished, simply click “Finish” at the top of the map.
We hope this RouteSavvy Shape Tools Tutorial was helpful. As always, if you have questions about RouteSavvy, please email Support@RouteSavvy.com or use the new chat feature on the website. We’re here to help!
Interested in taking RouteSavvy for a test drive? Register for our Free, 14-day Trial of RouteSavvy.